5 tips to get you started...
1. WHAT YOU NEED
- Camera with manual settings, including 'Bulb'
- Sturdy tripod (that can handle wind)
- Cable release or remote with timer/lock
- Extra battery if possible, because long exposures and cold weather decrease battery power
- Lens hood to avoid peripheral light leaks
- A timer (like on a phone) if not on your remote
- Small flashlight, headlamp (or phone) so you can see what you're doing
- Powerful flashlight with adjustable beam for painting, or for 'steel wool' photography: steel wool, gloves, string, a metal whisk and a lighter (take extreme care with this technique, it can be dangerous)
- Warm clothes, preferably black
- Shoot in RAW if you can
- Set your White balance to suit your light source. Try 'Tungsten' or 'Flourescent'
- Set your focus to 'one shot' focus, you don't want it to 'track'
- Attach your camera to tripod and turn off 'IS' or 'VR' on the lens
- Set the shooting mode to 'Bulb' and your exposure mode to 'Manual'
- Keep your ISO at 100 or 200 if you can, to minimize noise
- Aperture: start off at f5.6 and then adjust it when testing your exposure to control your depth of field
- Shutter Speed is best on 'Bulb' so you can expose longer than 30seconds
- Take a test shot, and make sure your exposure's a little on the dark side

3. FIND A LOCATION & SUBJECT
Try to get away from 'light pollution'. A bright full moon or city lights will interfere with your light painting, because your camera will record any light entering the lens.
Do you want to 'paint' around a subject? Or do you want to paint patterns? Look for a subject that will look interesting 'painted'.
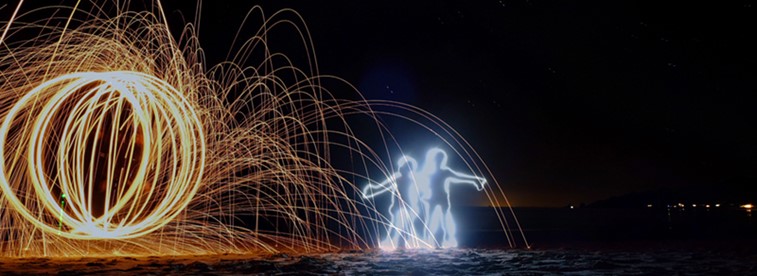
If you want to try 'steel wool' photography (pictured) you will need to be sure to find a location near water, like the beach, and far from dry grass or anything that could catch fire. It would be good to get the needed permission before you start.
4. FOCUS
Get a buddy to light up your subject with the flashlight and focus your lens. Once you've set the focus, use your focus lock feature to keep it there, or focus manually and don't touch the lens once it's set.
5. PAINT
If you're ready to shoot, turn off your headlamp or phone light, and be ready with your light source for painting. Hit the shutter button on your cable release and lock it there while someone times the exposure. Because you're wearing black, you can move in and out of the scene as you 'paint'. Keep moving with the light to avoid bright hot spots. Adjust the beam on the flashlight to change the effect, and create interest. The closer the light source is to the subject, the sharper the 'painting' lines will be.
Once you've taken your first shot, keep experimenting. Share your results with us. We'd love to see what you come up with!